XBOX 360 3RLOD FIX
By Carkus
Note: click on any of the thumbnails to open the larger version in a new window.
After getting the 3 red lights of death problem, I did some searching on the net, and found the following fixes. These aren't my fixes. I'm just documenting the way I did it. I take no responsibility for anyone breaking their xbox360's by following this guide.
The X-Clamp replacement is my recommended method to fix these 3rlod problems, and is the one that worked for me (so far anyway).
Background
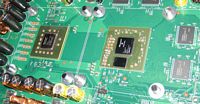
Before the 3RLOD issue prevented me from using my xbox, I was getting random freezing while using the xbox. This happened to occur while i was playing Guitar Hero 2 (after whammy patch was applied, but I was getting 1 or 2 odd freezes like this before the patch).

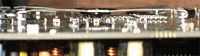
As you can see, I was getting weird artefact issues with the image when it was freezing. There was also an awful sound coming out the speakers for about a second.
After about 7 or so of these freezes, the xbox started giving me the dreaded 3rlod problem. Time to look for a fix, as my xbox was out of warranty.
Towel Trick
This part is more for reference. I don't recommend doing this method.
I read about the towel trick before I found out about the X-Clamp replacement, so thought I would give it a try. At the time, it was either this or the heat gun trick, which seemed a bit more risky, so I went with the towel method.
This method basically involves wrapping your xbox 360 up in a towel to prevent any airflow from getting in, or out, of the xbox 360. This in turn forces the xbox to get really hot. You must leave the video plug attached, so that the xbox does not auto shut off. I left it running for about 15 minutes. It got pretty warm...
I'm not sure on the specifics, but I believe this just allows the solder on the cpu/gpu/ram to reflow, and fix the bad connections. As the x-clamp is still in use, this method generally will fail, and it did for me after about 2 days (and I wasn't using it heavily).
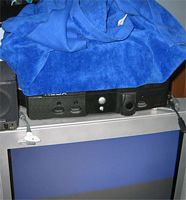
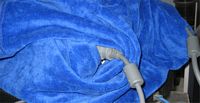
(xbox360 is wrapped in towel above my original xbox). TV underneath showing no signal.
X-Clamp Replacement Fix
The X-Clamp replacement actually fixes the initial cause of the problem, which is the flexing of the cpu/gpu/board, causing faulty solder joints. Reflowing the solder may fix it, but if the x-clamps are still there, there is a fair chance the problem will just come back. This is the fix that I recommend, as it has fixed my xbox360 (currently working without any issues, at the moment anyway).
Success thread can be found here: http://forums.xbox-scene.com/index.php?showtopic=595746
This guide differs slightly from some of the other guides, due to not being able to find the right length of bolts, and not being able to find nylon/fibre washers. I recommend reading the other guides found on the above link, and work out the best method to do it for yourself, with the parts that are available to you.
Parts I Used:
Qty |
Item |
Notes |
8 | 5/32. Machine Washer | (Slightly small for bolt, so had to grind away a bit). |
8 | 3/16. Machine Washer | (Slightly big). |
8 | 3/16. Spring Washer | (Had to flatten using pliers). |
8 | M5 x 15mm Round Head Bolt | (Get 10mm if you can, as I had to cut mine). |
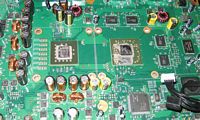
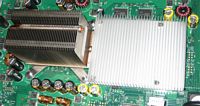
Here is a picture of the underside of the xbox 360 motherboard, showing the X-Clamp. It's a bit of a pain to remove, but you basically just use a screwdriver, and wedge/force the end parts off the bolt part going through the board. The first couple may be pretty stiff, so you may will need a bit of force.
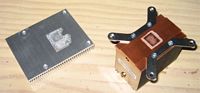
Once the X-Clamps are removed, the heatsinks will just come off. Just lift the heatsinks off the cpu/gpu.
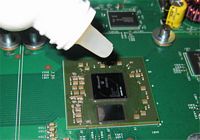
There is a fair bit of thick thermal compound on both the cpu/gpu and heatsinks. This needs to be removed.
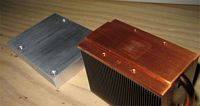
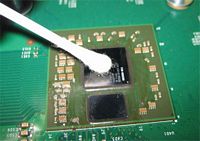
After a quick clean, they should look similar to the next picture. Use ArctiClean 1 to get a good clean surface. This next picture is after using a credit card to remove excess paste, but before using ArctiClean 1.
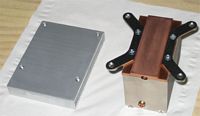
This part is completely optional. I wanted make the contact surface of both heatsinks as smooth as possible, so I decided to lap the heatsinks. There are plenty of guides on the internet describing these methods in great detail.
Basically it involves wet sanding the heatsinks on a flat surface (glass, or similarly flat surface), to remove any possible rough grooves in the heatsink. I started with 600 grit, and moved onto 800, and finished with 1200 grit. You could go to 2000 grit if you want.
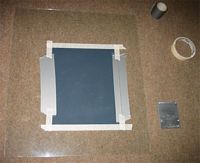
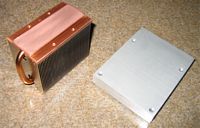
The following picture shows the finished result. Hard to capture on the camera, but they are smoother than they used to be before lapping.
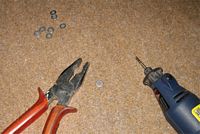
My 5/32. machine washers were too slightly small for the M5 bolt to go through. I had to use a rotary tool (dremel clone) to cut away a bit to make the inner hole slightly larger.
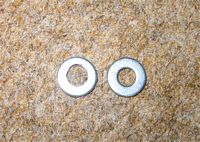
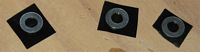
This shows the before and after shot of one of the washers.
As mentioned in the parts list, my 15mm bolts were too long. I cut them down to approx 10mm. The only 10mm bolts I could find had a large head on them, and they wouldn't fit properly under the xbox motherboard. I simply cut the 15mm bolts using a cut-off wheel attachment.
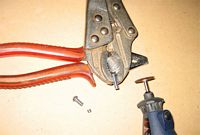
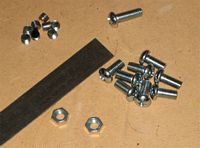
This photo shows the bolts after I had cut them to size, with one 15mm thrown in for comparison.
I couldn't find any nylon or fibre washers (use them if you can find them), so I had to improvise a bit. I used electrical tape on one side of the washer to insulate the washer from tracks on the motherboard.
I cut a hole in the middle of the tape, and fed the bolt through, so that the exposed side of the washer was on the same side as the bolt head.
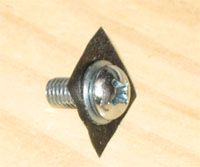
Cheap and nasty solution, that ended up working well. Push the bolts in through from the bottom side of the board.
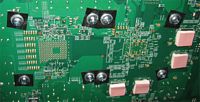
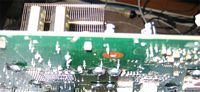
This is what the board looked like from underneath
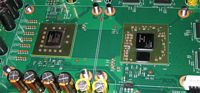
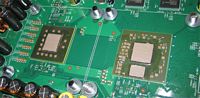
This is what the board looked like from above
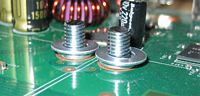
The top washers go on next.
I used a flattened 3/16. spring washers on the top. These were a bit smaller than the 5/32. washers in diameter, so no insulation was needed. (I couldn't use these on the bottom, as they are slightly thicker than the other washers, and would have caused the motherboard to sit a bit too high).
I used the 3/16. machine washers on top of the spring washers, as there wasn't any electrical parts they would touch, so even though they are slightly too big, they worked fine. These two washers ended up being the perfect height to support the heatsinks, and prevent too much pressure being applied on the board.
Next came cleaning the cpu, gpu, and heatsinks.
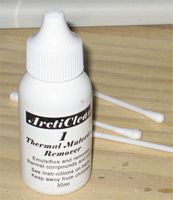
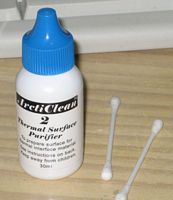
ArctiClean 1 and 2 work well for this part. I used both parts on the cpu, gpu, and heatsinks.
Use a toothpick or similar to remove any large chunks before using ArtiClean 1 to make it easier.
Apply the thermal compound to the CPU and GPU. I used Arctic Silver 5. It is the recommended thermal compound for this fix.
You have two options when applying Arctic Silver. You can use a rice sized blob, and let the heatsink spread it over the cpu, or spread the Arctic Silver over the cpu die evenly using a razor blade or other flat device. I went for the latter option, as I thought it might have been hard to get the heatsink to go straight down onto the cpu perfectly, due to the bolts getting in the way.
Either way will work. The rice sized blob is the way they recommend doing it on the Arctic Silver website.
Lower the heatsinks down onto the bolts, align, and start screwing the bolts into the heatsinks. The M5 bolts should be a perfect fit for the original thread in both the heatsinks.
Don't over tighten any one bolt straight away. You need to allow even pressure on all 4 corners of each heatsink. Turn the screw's similar to a car tire, alternating the bolts you turn in a sort of star type pattern to apply even pressure on the cpu/gpu. Turn each bolt a little bit, and then move to the next.
I was able to tighten them fairly tight. Don't tighten them up enough to break the cpu or gpu. My two washers on the top side of the board, under the heatsinks, prevented me from applying too much pressure, however your results may vary depending on the thickness of the washers you use.
Seat the xbox 360 motherboard back in the RF shield casing. Connect the power/led module to the front so we can turn it on, and see the LED's. Don't connect any fan's at this stage.
Turn on your xbox, and see if you get the three red lights appear on the front again. The odds are you will, but if you don't, the fix is finished, and you can reattach the fans, all other components, and reassemble the xbox.
If you do still get the three red lights, leave the xbox running. It will get hot, and eventually overheat. This is what we want to happen, as it will reflow the solder under the cpu/gpu/ram and fix any solder problems (similar to what the towel trick did, but now we have fixed the main cause, the x-clamp).
After about 5 minutes, the xbox 360 will overheat, and the three flashing red lights will turn to just two flashing red lights. When this occurs, leave the xbox on for a further two minutes. This should provide enough time, at a hot temperature, to reflow the solder.
After two minutes, turn off the xbox, and wait for it to completely cool down. (30 minutes?).

After the xbox has cooled off, reattach the fans, put on the white air ducting, and give it a test.
Hopefully you get the normal xbox360 start up lights appear, and your xbox is all working. If not, double check what you have done, possibly repeating the overheating step for a longer period. If you still dont have any luck, try the xbox-scene forums.
If everything is all good, reassemble your xbox360, and enjoy.
Any cooling mods that you can do will be beneficial. I added a set of Talismoon Whisper fans, replacing the original ones. They are meant to flow 50% more air or something around that figure. I may cut the mesh grill at the back to allow more air to flow through at a later date (both metal and plastic parts).

My rebirthed xbox, running with the aftermarket Talismoon Whisper fans.

Final Notes
Thanks go out to RBJtech and Lawdawg0931 for their tutorials available on xbox-scene, and all the contributing members of the various x-clamp replacement threads. These tutorials, and the tips in the threads, are what I based my fix on.
Links to their guides can be found here: http://forums.xbox-scene.com/index.php?showtopic=595746